- To define constant values, use the def keyword (instead of the readonly keyword in the preview). E.g.,
def PI = 3.14;
- To write an application (with Swing frames), use the javafx.stage.Stage and the javafx.scene.Scene classes as follows. There is no javafx.ext.swing.SwingFrame class or javafx.application package.
Stage {
  scene: Scene {
    content: ...
  }
}
Programs written in this way can also be executed as applets without modification. - Swing components in the javafx.ext.swing package are prefixed by Swing. For example, the Swing label is javafx.ext.swing.SwingLabel (instead of javafx.ext.swing.Label in the preview).
- To layout GUI components, use the classes in the javafx.scene.layout package, such as the VBox and HBox classes. There is no panel class in the javafx.ext.swing package (such as FlowPanel in the preview).
- The preferred size of a Swing component in javafx.ext.swing package cannot be modified when the it is created. (It could be in the preview.)
- In class definition, attributes (instance variables) are declared using the var keyword (instead of attribute in the preview). E.g.,
class Person { var name: String; } - To declare a function that overrides a superclass's function, use the override keyword (no need in the preview):
class Person { override function toString() : String { "..." } } - There is no menu support. (The Menu and MenuItem classes in the javafx.ext.swing package exist in the preview but not in 1.0.)
- The shape classes, such as Rectangle and Circle, are in the javafx.scene.shape package (instead of the javafx.scene.geometry package).
- To start, or play, a Timeline, call the Timeline's play() method (instead of the start() method in the preview.)
- Shapes, in the javafx.scene.shape package, are not transparent by default. Set a shape's color attribute to Color.TRANSPARENT to make it transparent.
- The + operator cannot be applied to strings, e.g., 10 + " cents" is not valid. Use string interpolation instead. E.g.,
int n = 10; var s = "{n} cents"; - There are built-in functions print() and println(). There is no need to use java.lang.System.out.println() and java.lang.System.out.print() now.
- There is a built-in function FX.exit(). There is no need to use java.lang.System.exit() now.
Sunday, December 07, 2008
Migrating from preview SDK to 1.0 of JavaFX
I'm developing a course that includes the JavaFX technology. That part was written a few months ago, based on the JavaFX preview SDK. As the JavaFX 1.0 has been released, I convert the programs from the JavaFX preview to 1.0. The following is a summary of the changes in JavaFX that I notice during the conversion.
Monday, February 04, 2008
Classes and objects
In every first lesson of object-oriented programming, the concepts of classes and objects are introduced. Typically,
- an object represents an entity in real life that has states and behaviours, and
- a class is a blueprint/template/design of a certain type of similar objects.
When writing a function, we are defining what will happen when the function is used (invoked). For example, let's define a function sum:
int sum(int a, int b) {
int r;
r = a + b;
return r;
}
This definition does nothing more than allowing the system to look up the method's execution when it is used elsewhere. When this function is invoked
int x = sum(100, 200);
the system uses the definition of sum and executes the code in the definition.
In a similar way, a class is the definition of an object. It defines what will happen when the object is used. While using a function is mostly obvious - invoking it, using an object can be more complex - creating it, accessing its data fields, invoking its methods. Here I write a class Circle (as definition of Circle objects):
class Circle {
int radius; // data field
Circle(int r) { // constructor
radius = r;
}
double getArea() { // method
return radius * radius * 3.1416;
}
}
When Circle objects are used in some other code, the system will look into the class and execute the proper code in the class. For example, with
Circle c = new Circle(10);
the constructor of class Circle will execute and a Circle object is created. With
c.radius = 9;
the data field radius of the newly created Circle will be changed. With
c.getRadius()
the code inside the method getRadius of the Circle will be executed.
Tuesday, March 07, 2006
From zero to a running servlet in one minute
Many learners to programming servlets find it difficult to get started working with Tomcat - installing, configuring, deploying with the Tomcat manager or admin, reloading a modified servlet, etc. etc. Using Netbeans can greatly reduce the frustration in initial studying, as we can create a working servlet easily and quickly. Here are the steps:
- Start Netbeans

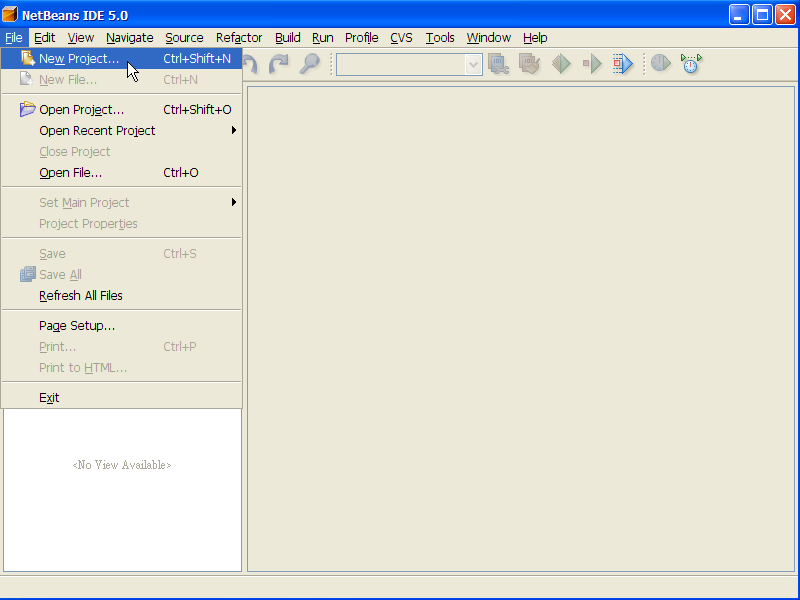
- Create a project by clicking the menu File -> New Project...

- In the New Project dialog, select Category of Web, and Projects type Web Application, then click Next >

- In the New Web Application dialog, enter the Project Name (e.g., WebExample1), then click Next >

- In the next step, we don't use any framework, so just click Finish.

- Netbeans is creating the project.

- The project is created. We can just ignore the default JSP page that is automatically generated.

- Now, let's create a servlet. Click the menu File -> New File...

- In the New File dialog, select the Category of Web, and the File Type of Servlet, then click Next >

- In the New Servlet dialog, enter the Class Name (e.g., ServletExample1), then click Next >

- In the next step, we use all default deployment values, so just click Finish.

- A complete servlet is generated.

- Edit the servlet do show something. E.g., remove the line "/* TODO output your page here." and the line "*/".

- After editing the servlet, save it by clicking the menu File -> Save.

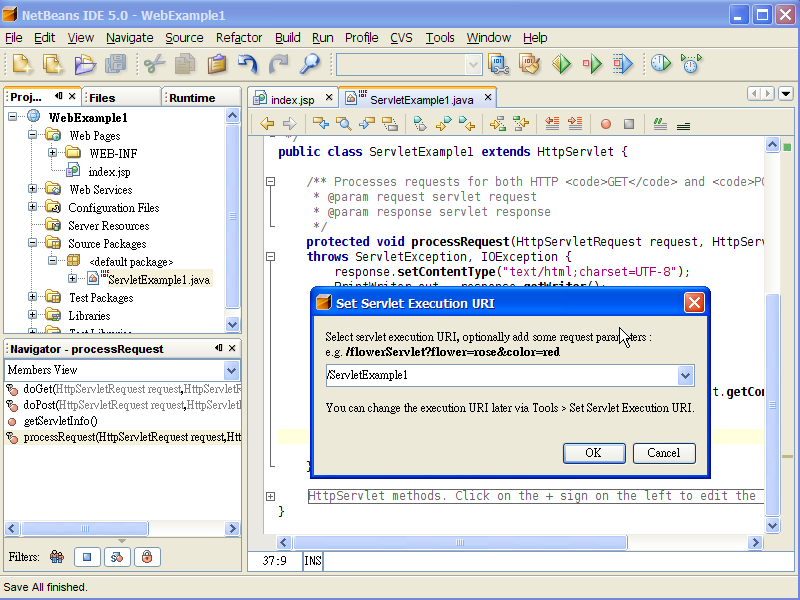
- We can now run the servlet. Click the menu Run -> Run File -> Run "ServletExample1.java"

- Accept the default Execution URL by clicking OK.

- Netbeans will compile the servlet, start the Tomcat server, deploy the web app.

- And then open a browser to access the URL for your servlet. The servlet is executed.


In this way, we can create and run a servlet, without the installation and configuration of Tomcat. Tomcat 5.5.9 is bundled and pre-configured in Netbeans 5.0.
Subscribe to:
Posts (Atom)